Home › Forums › Motorcycle Tech Talk › Bing carb overhaul (only for airheads :-)
-
AuthorPosts
-
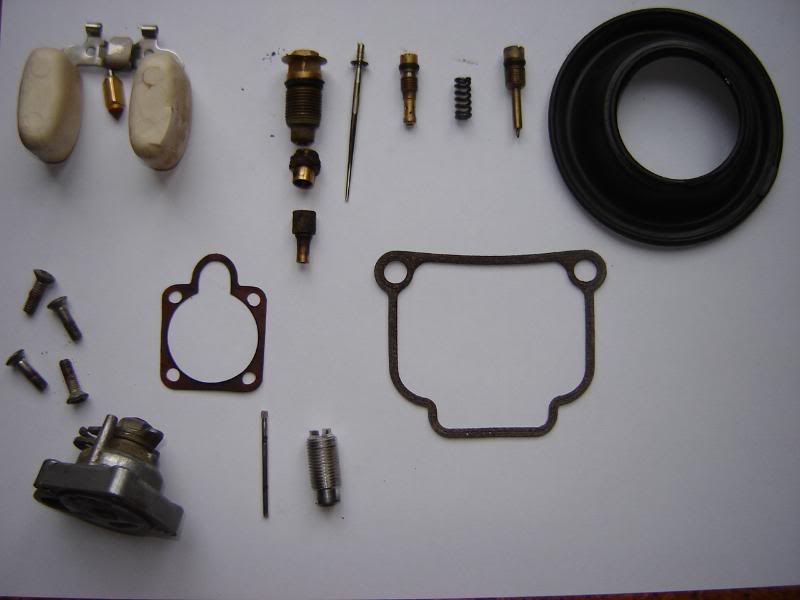
I finally managed to get all my ducks in a row. Got the carb parts and a lousy weekend to do it on.There are plenty of websites describing the procedure in sufficient detail, but it isn't the same until you've actually done it yourself. I'll add a few pictures later.The reason I wanted to service the carbs was the high fuel consumption I've been getting. That was even before the annoyingly high fuel prices. 8 litres per 100km is just too much.Taking the carbs off is easy enough, but it's probably a good idea to undo the carb cap screws prior to taking them off. These screws can be really tight due to a bit of corrosion. You need a well fitting pozidrive screw driver to undo them. After that undo the air hoses, the fuel line and then unhook the trottle cables and the choke cable. Take a good look at the cables, mine were frayed. Don't cut yourself on the frayed cables, it hurts.I cleaned the outside of the carb body with a bit of petrols and a brush. Do this outside, where good gloves and don't smoke while you are doing it. it also pays to wear safety glasses in case of splashes.Once the outside was clean you can remove the top, after having removed the springs and pull out the diaphragm complete with slide and needle. Undo the four screws that hold the diaphragm to the slide. Don't lose the screws. Inspect the diaphragm and put it in a safe place for reuse, or discard it if it's damaged or very old.Clean out the tube in the slide. You'll have to reach in with a screw driver to undo the screw that hold the slide needle. For this type of cleaning you'll need some carb cleaner. It is nasty stuff and will give you a head ache if you inhale any of it. Do not get it on your skin, it is an evil chemical.Now take the float bowl off and remove the floats. The is a small pin with a knurled end holding the floats to the carb body. Use a pin to push it out opposite the knurled end. Do not whack it, or you will regret it.Now pick up the float needle off the ground, if you have dropped it. I have replaced mine, so it didn't matter. The float needle looks like a small plumb bob with a rubbery pointy end. It is loosely held to the floats by a very fine wire clip. Do not bend the float assembly.Next remove the idle screw, the main jet and the idle air screw. Don't loose any of this stuff. Take off the o-rings.Remove the choke assembly from the outside of the carbs, it's held on by a 11mm nut and for pozidrive screws. You will replace the paper gasket underneath.Clean the parts and the inside of the carb body with carb cleaner. Do not poke around the orifices with anything that can cause scratches or get stuck in the tiny holes. best to just blow it through with the aerosol carb cleaner. You are wearing safety glasses, right?Once every thing is clean replace the o-rings. Your carb kit will tell you which ones go where.If you are placing the needles take note where the slide needle clip is located. On mine it was the second notch from the bottom. You can now replace the slide needle and re attach to the diaphragm to the slide, make sure the diaphragm taps line up with the notches on the slide. Do not yet reattach it to the carb body.Before you do that you'll need to re-seat the main jet. Make sure the needle holder is seated properly before tightening the jet. If the is any resistance stop immediately and check the alignment. Replace the idle air screw and the idle jet. Now you can reattach the floats with the float needle. Reattach the float bowl, with a new gasket, if you want. Next carefully insert the slide, making sure that the needle does not jam against anything. It must align with the hole at the bottom. the needle should be loose.At the large spring, reattach the top and reattach the choke housing to the carb body, using a new gasket of course.To the Oldtimers, please let me know if I've left anything important out or have made a factual mistake.Check the large inner spring for damage, mine was worn paper thin, snapped and now I have to buy a new one, before I can finish the job.I have not replaced the throttle shaft o-ring, this time around. The whole job is not difficult, if you take safety precautions and proceed slowly and logically. Has it made a difference? I don't know yet, but I would be surprised if it hasn't.On the picture below the main jet assembly is out of sequence. [img width=800 height=600]http://www.advrider.com/forums/attachment.php?attachmentid=174353&stc=1&d=1214640591[/img]
Often you will find the choke gasket has deformed and no longer seals properly. Replaceing the carb main shaft “o”ring can be difficult as the screws that holt the butterfly to the shaft have been bruised where they protrude through the shaft, this bruising needs to be relieved before attempting to undo the screws. Otherwise you will damage the slot and it will be even more difficult to undo. replace these screws on reassembly. I have locktited them occasionally when they haven't been imediately available without any repercussions. If not bruised / locktited they may be swallowed along with the butterfly, the valves have a difficult time digesting them and that cylinder can/will be out of action. I recommended that you do “ALL the 'O' rings as to have to redo the job can be a PITA. Also allowing the carb body to soak in carb cleaner softens any scale that can block the tiny airways, before being blown out.
I'm still reluctant to mess with the throttle shaft, although I won't get around it when replacing the shaft on my 1150. I couldn't spot any staking on either side of the throttle shaft screws, but I'll have another look when I replace the inner springs.Does that little cap on top of the carb cap be loose or tight? I have one of each.I am pretty sure the interior is clean. I sprayed carb cleaner through all passages and it came out the other end. I really hate the stuff.
Here are some more photos.Before
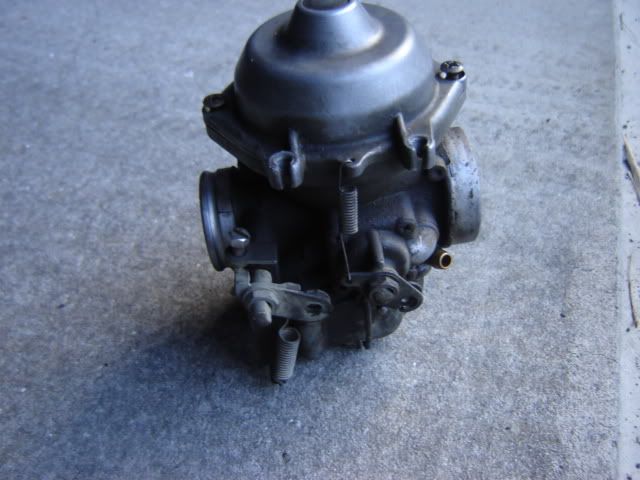 Some new fuel lines might be in order
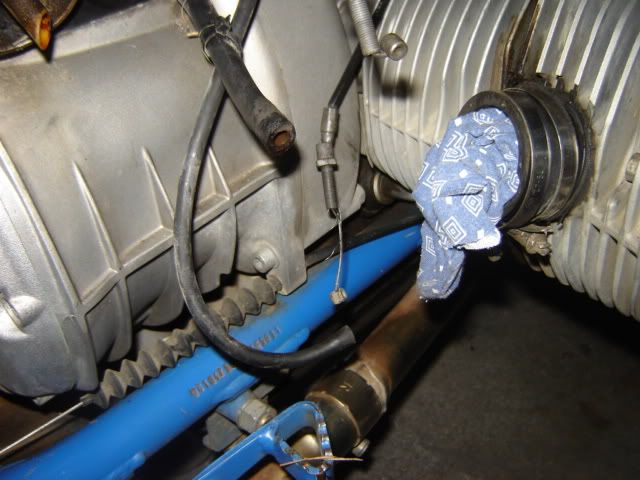
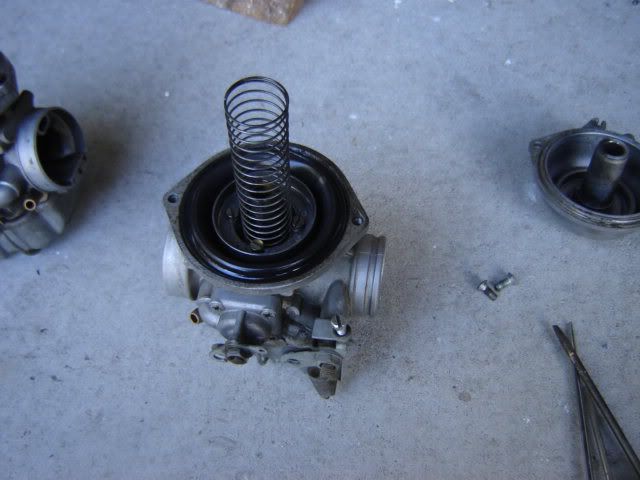
 This one is still filthy, the left one was a lot worse than the right one.
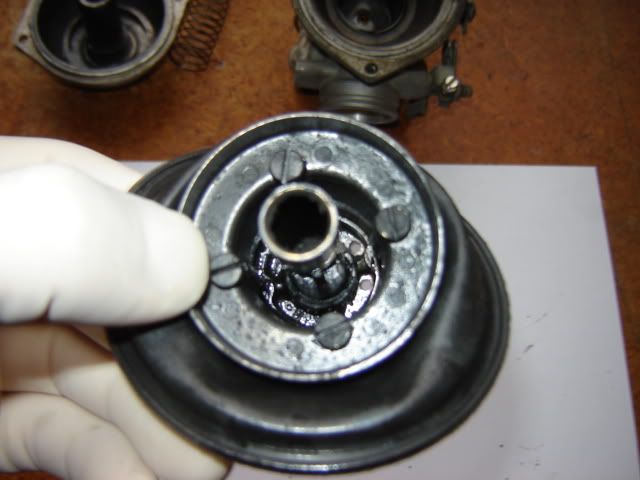 Here it looks a lot cleaner, can't see any evidence that the screws have been staked. Perhaps they were fixed with loctite from the factory, after all it's a 1996 model and a lot younger than some oilheads.
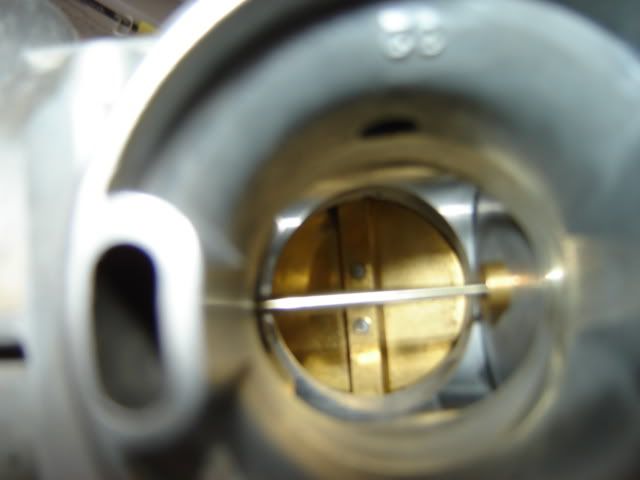
Replaceing the carb main shaft "o"ring can be difficult as the screws that holt the butterfly to the shaft have been bruised where they protrude through the shaft, this bruising needs to be relieved before attempting to undo the screws. Otherwise you will damage the slot and it will be even more difficult to undo. replace these screws on reassembly.
I've had a closer look and I can see now that the screws have had a bruise on the other end. What's the best approach to remove this? New screws came with the kit.
Re the staked/bruised screws I have both carefully ground them with a rotary burr and have also equally carefully drilled them. A light centre pop will be enough to centralize the drill bit. But be careful to support the otherside of the butterfly shaft when you pop it so it doesn't get bent, also support it if/when you rebruise the end of the screw. Far more reliable than the locktite route.I gather the loose part you are talking about is the round plug on the top of the diaphragm housing, it should be tight.A part that often gets over looked for replacement is the needle and the needle jet. this is the part in the centre of your picture, the 2nd piece below the main jet housing body. It will have a no. on it. Neil should have them in stock, just don't replace the one without the other. this will have an immediate effect on reducing fuel consumption, and yes replace the spring. email me on if I can be of further assistance.
I went ahead and changed the throttle shaft O-ring as well. It was quite easy. I used a file to remove the bruising on the screw thread. I hadn't realized that these were brass screws as well, so filing didn't take long. As soon as the rest of my carb parts arrive the job is complete.This gives me the confidence to go ahead and replace the throttle shaft on my R1150GS, so it will be rattle free again.Thanks for all your help.
Looks like all my wrenching was successful. The bike runs better than ever. I also replaced the pushrod tube seals and now the engine block stays clean. The bike's fuel consumption is down to at least 6L/100km from a peak of 8L/km. With today's fuel prices this will pay for the parts within 4000km. The best bit is that it's got most its power back. What a difference.I've learned heaps by just having a go. Airhead gave me quite a bit of support as I completely lack any reference points. Those old boxers are relatively easy to work on, everything is big and solid, so you're not likely to break something easily.
Anonymous
Inactive13/07/2008 at 5:52 amPost count: 305Call me weird, but I was following you on Tony's bike, the aroma of your exhaust smelled “retro”. I don't know how it works, because it's the same stuff petrol going in, but older vehicles put out a different smell.Any thoughts?
There was an instance when two bikes came the other way and one of them seemed to have that Castor oil smell that I smell at the classic bike races. I hope my bike wasn't blowing any smoke and burning oil. I do need a new gasket where the header joins the pipe.Most modern bikes seem to have a catalytic converter, so they may not smell at all.
What you need is a few mils of Castrol 'R' in your fuel tank to give it a good smell. 🙄
-
AuthorPosts
- You must be logged in to reply to this topic.
